
Burlap Wreath (method 2)
If you follow my FB page (MOOSEink), then you saw another wreath I made. If not, here's a picture (sorry, but I'm not using my Canon, just the iPhone so the colors are not amazing... Nor the quality. Don't judge)

This wreath used a similar method to the one I made tonight. Once I find the link to the blog I used, I will insert it here.
Ok, onto the tutorial.

HERE'S WHAT YOU'LL NEED:
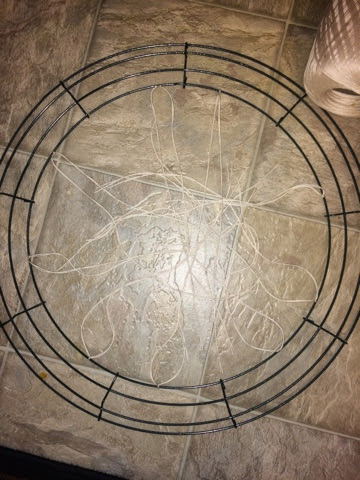
•18" wire wreath ($5 @Michael's)
•10yd burlap ($7 @Michael's unless you buy on sale... Which I did!! Woo-hoo for $2.50!!)
•7-10yd deco mesh (I had a coupon but I think it was $5 @Michael's)
•5-10yd ribbon (I used some left over fabric I bought to make a scarf)
• roll of twine/thin ribbon/yarn -or- 18 pipe cleaners
In this tutorial, I used yarn bc I ran out of pipe cleaners and I was SOOOO not going back to Michael's. But Becca, how did you run out of pipe cleaners? Didn't you buy a bag that had roughly 100? Yes, yes I did. As a matter of fact, they were all present and accounted for before I ran to Michael's this morning and left the boys with my very capable husband. Somehow, in a 2 hour time span, I went from having a little over 80 pipe cleaners, down to 4. Where are the others? Hmmm, good question. They are probably hanging out with my missing hair dryer attachment and remotes. I will find them in 18-months when we move. Until then, I'm McGuyver-ing it with yarn.
Sooooo, if you're like me and have a ton of yarn just laying around and want to use that... Go for it. If you're using yarn, cut 36 pieces. If you're using pipe cleaners, get out 18. Yarn in bold; pipe cleaners in Italics.

PC: Loop PC through wreath, making sure there is equal length on both sides. Twist once. Start with inside. 1 per section. Do the same for the outside.

And that just screams to my boys, "YOU MUST TOUCH ME NOW AND SWING ME AROUND UNTIL YOU HURT ONE ANOTHER AND DRIVE YOUR MOTHER INSANE!!" So, I waited til they went to bed. Apologies.
Next: Start in the innermost wire: take your burlap and tie it with a double knot -or- twist once

Add the deco mesh, using the same technique.

Fantastic. Now, grab about a hand's length down from where you attached your initial piece of mesh/burlap and tie it or twist it together on the next section.

If you are using the yarn, it'll feel loose. If you are using PC, you won't have to work as hard to make it secure. Continue this process all the way around the innermost wire and then attach your mesh/burlap to the outermost wire.

Starting to see it coming together? Keep it up! Using the same process as the inner circle, attach the mesh/burlap to the outer circle.

You will have some left over. A lot, actually. If you are like me and hate to waste any fabric, ever, continue on. If you don't mind wasting, the you can stop and move on to the ribbon part.
All others, here you go.
Using the same technique, make the mesh/burlap go in between the two circles and attach using BOTH yarn strands -or- PC from the outermost and innermost parts of the wreath.

It's a freaking CRAZY concept, but i'm telling yeah try it. Continue through the middle circle and tie off at the end.

Looks good doesn't it? Now flip it over and tie the strings together or twist the PC around.

Now you can stop or you can add ribbon. I had leftover fabric and decided to try using that. I did not like how the strings left very noticeable areas on the wreath (even after I fluffed it), so I used my fabric to hide the visible string. Turn your wreath so the right side is facing you...I weaved the fabric over the string and then under it for each section, making sure I kept my fabric in the middle circle. I ended up having to cut two strips of fabric and tie them onto the wreath. You can do that or you can use hot glue. Or you can be really crazy and do both.

Go all the way around the wreath and then tie off OR make a bow. I opted for a bow, but I might end up stitching together my fabric with my left over deco mesh to make the bow stand out a bit more. Who knows. Actually, now that I'm thinking about it, yes. That is probably what I'm going to do.

And there you have it. Fluff out each portion to make it appear bigger. Add cute things to it too- just know, that's typically where these things get expensive... And if you can see through your wreath in some areas, don't worry, no one is going to notice the wire from the street. Go pour yourself a glass of wine and have your husband, boyfriend, girlfriend or whomever witness your awesomeness. For real, you deserve a pat on the back.
If you make a wreath using this technique, please, leave a picture on my FB page!! I want to see them all!!
No comments:
Post a Comment